Wedding Photography Tips for Beginners: The Ultimate Guide
Wedding photography is a rich blend of various genres, including portrait, family, group, documentary, boudoir, event, and close-up photography. For beginners, there’s a lot to learn to ensure you capture every important moment flawlessly. Here’s a comprehensive guide to help you get started on your wedding photography journey.
1. Start by Assisting a Professional
Before you dive into wedding photography on your own, consider reaching out to an experienced photographer. Shadowing them during a few weddings can offer invaluable insights. Look for photographers on platforms like WeddingWire, Yelp, or The Knot. You can also ask recently married friends who their photographer was for recommendations.
2. Prepare Your Documents
A solid wedding photography contract is essential. It should detail the services provided, obligations of both parties, agreed fees, and payment information. A well-drafted contract will protect you in case of any legal disputes.
3. Get to Know the Couple
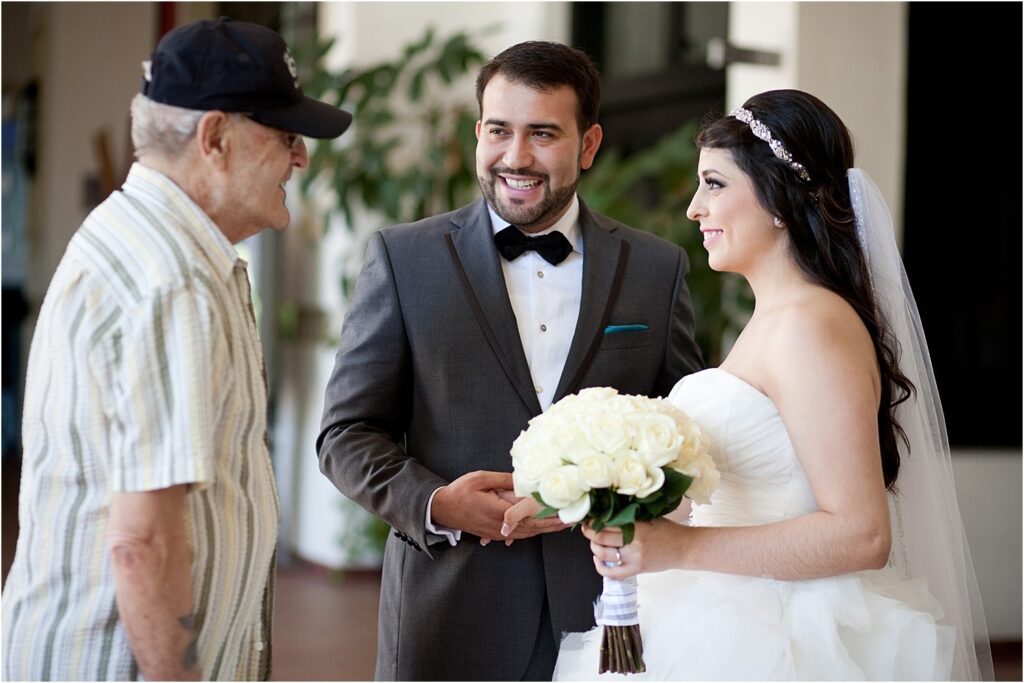
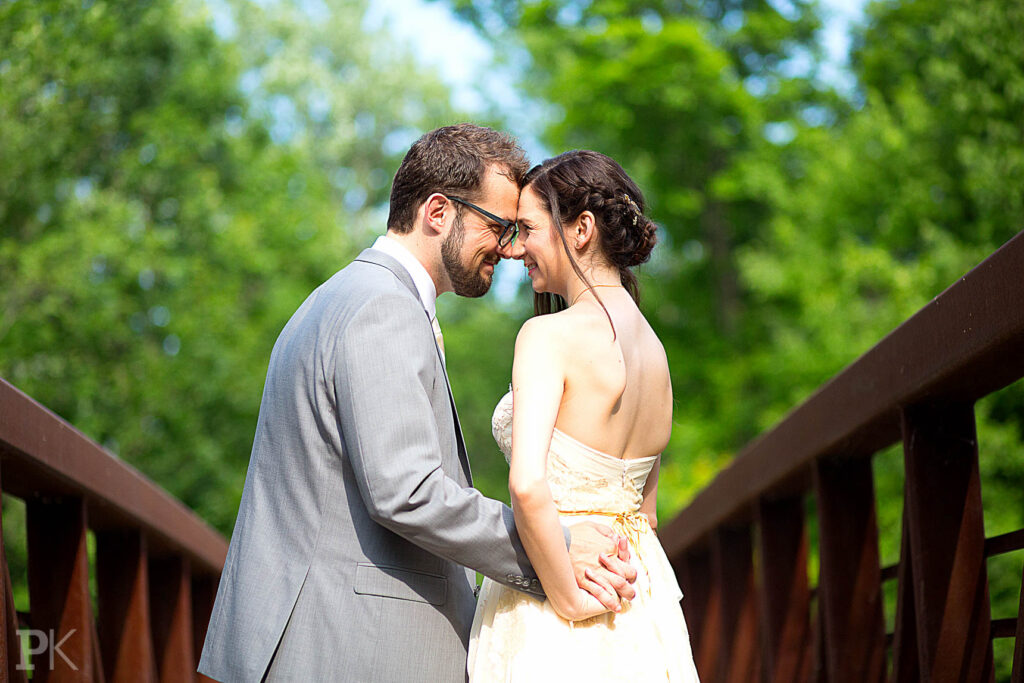
Building a connection with the couple is crucial for capturing their special day. Offer to take their engagement photos at a discount to get to know them better, or meet for a coffee to discuss their expectations. Send them a questionnaire to learn about their preferences, such as:
- Do they prefer posed formal photos or candid shots?
- Which parts of the wedding day need coverage (e.g., bridal prep, ceremony, reception)?
- Are there any surprises or special events planned?
- How many guests will be present?
- Are there guests they’d prefer not to photograph?
- Should you plan a large group photo?

4. Familiarize Yourself with the Guests

Understand the dynamics of the wedding guest list. Note who is closest to the couple and review their photos or social media profiles to recognize key individuals during the event.
5. Create a Mood Board

Get inspired by platforms like Pinterest, Behance, and Flickr. Share your mood board with the couple to align on photo styles. Creating a mood board with tools like Canva or InVision can help set expectations and guide your approach.
6. Scout the Venue

Visit the ceremony and reception locations beforehand to understand the lighting conditions and photography policies. If an in-person visit isn’t possible, research the venues online and contact management to inquire about their photography rules.
7. Check the Lighting

Natural light, such as window light and golden hour, can enhance your photos. If natural light is lacking, use on-camera flash or reflectors. Be aware of any venue-specific flash regulations and consider using a flash diffuser to avoid color casts.
8. Hire an Assistant
A professional photographer often has an assistant to handle lighting, tests, and additional shots. Find an assistant through local photography clubs or websites like The Association of Photographers and Airtasker.
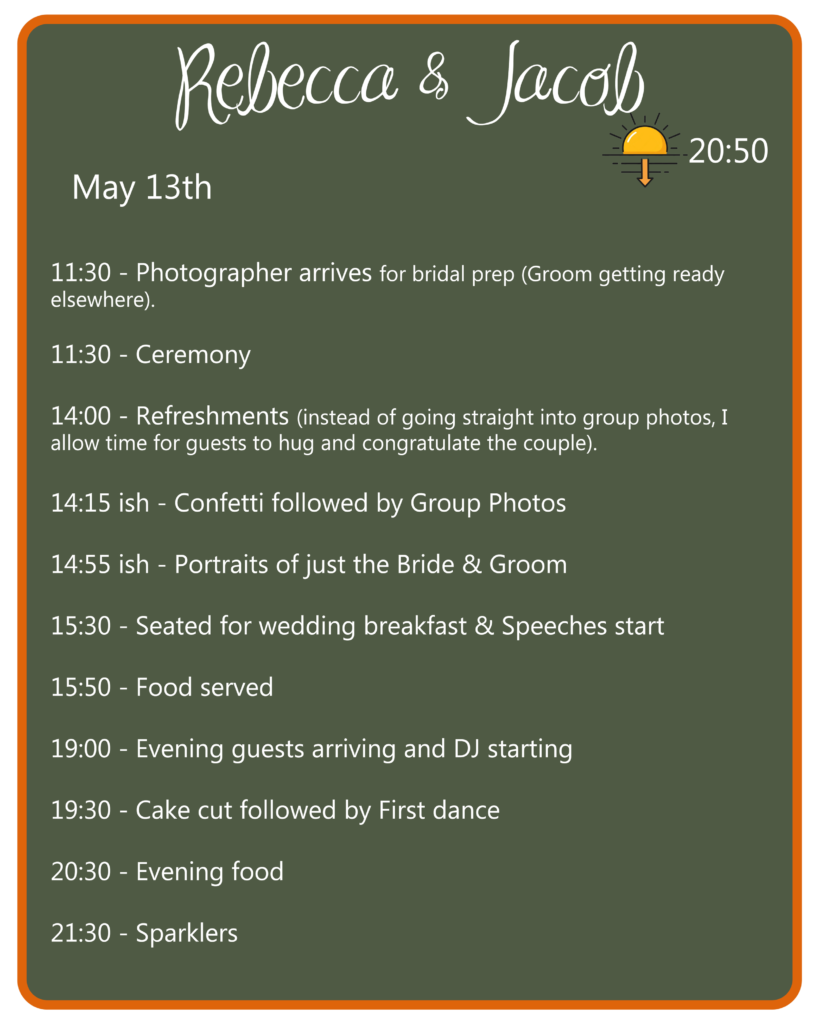
9. Get a Copy of the Wedding Program
Having a detailed wedding program helps you stay organized and ensures you capture all key moments. Familiarize yourself with the ceremony’s structure and any unique elements.
10. Prepare a Pre-Ceremony Checklist
Before the big day:
- Confirm the schedule with the bride and check in with a supportive message.
- Charge your camera and flash batteries, clean lenses, and organize SD cards.
- Review the schedule and plan your route to the venue.
- On the wedding day, verify your gear, pack a snack, and dress professionally.
11. Organize Your Gear
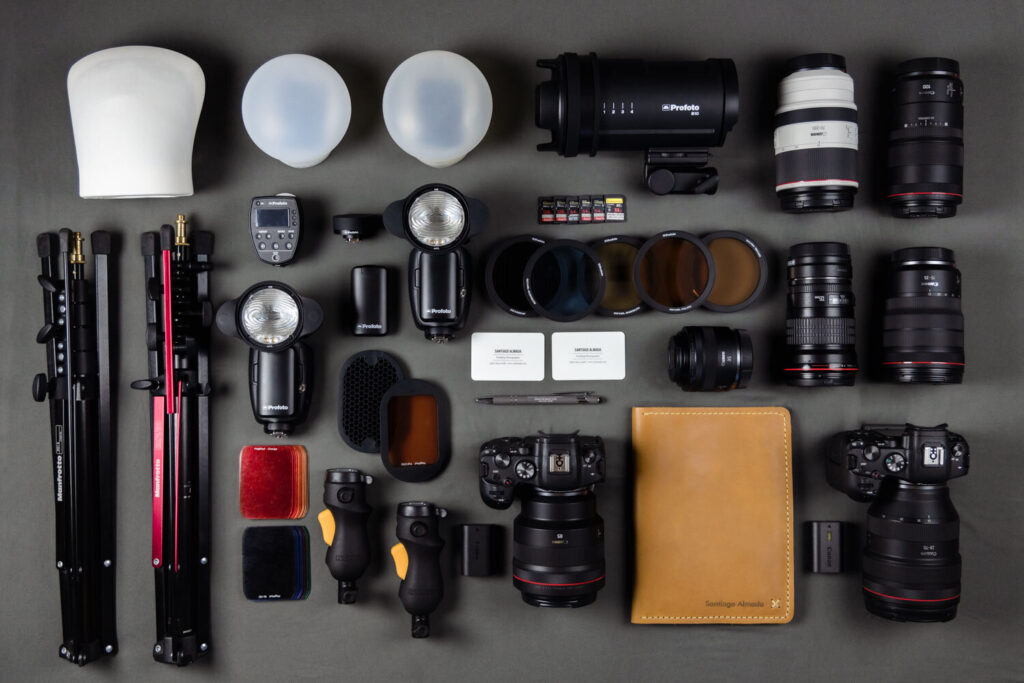
Bring at least two camera bodies (preferably full-frame with 24MP or more), 2-3 lenses with various focal lengths, a flash with a diffuser, and other accessories like SD cards, chargers, a tripod, and reflectors. A well-organized camera bag is essential for keeping everything in order.
12. Always Have a Backup Camera
To avoid disruptions, bring a backup camera body. You don’t need a high-end model; a budget-friendly option or a rental can suffice. Keep the spare camera accessible during the shoot.
13. Don’t Rely on One Battery and Memory Card
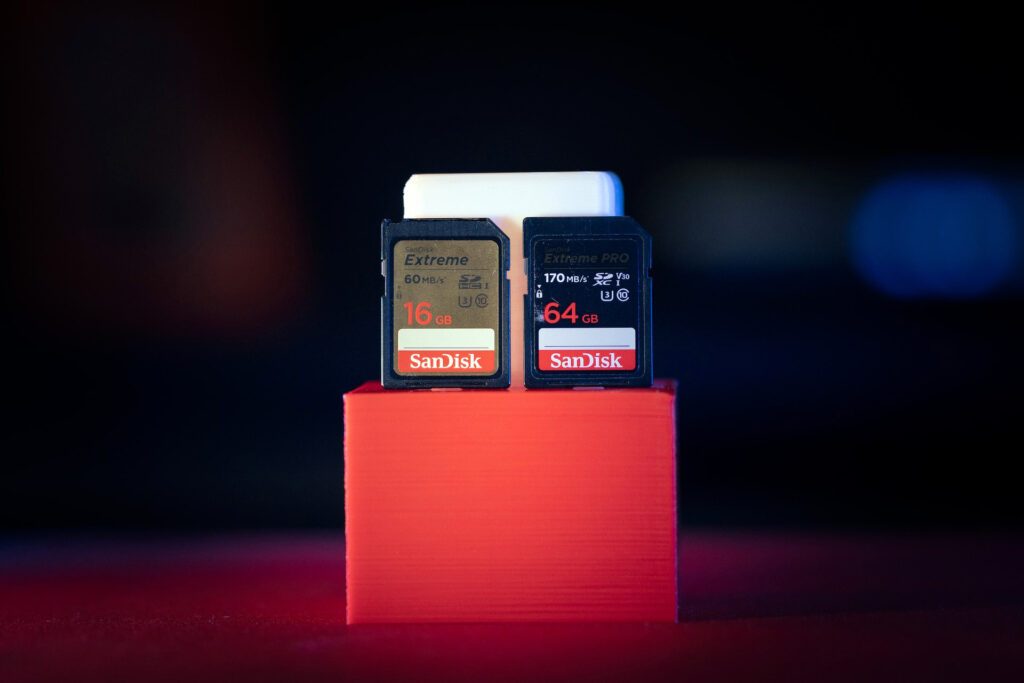
Carry multiple charged batteries and extra SD cards. Running out of power or storage should not halt the event. Ensure you have enough resources to last through the ceremony and reception.
14. Use Multiple Lenses
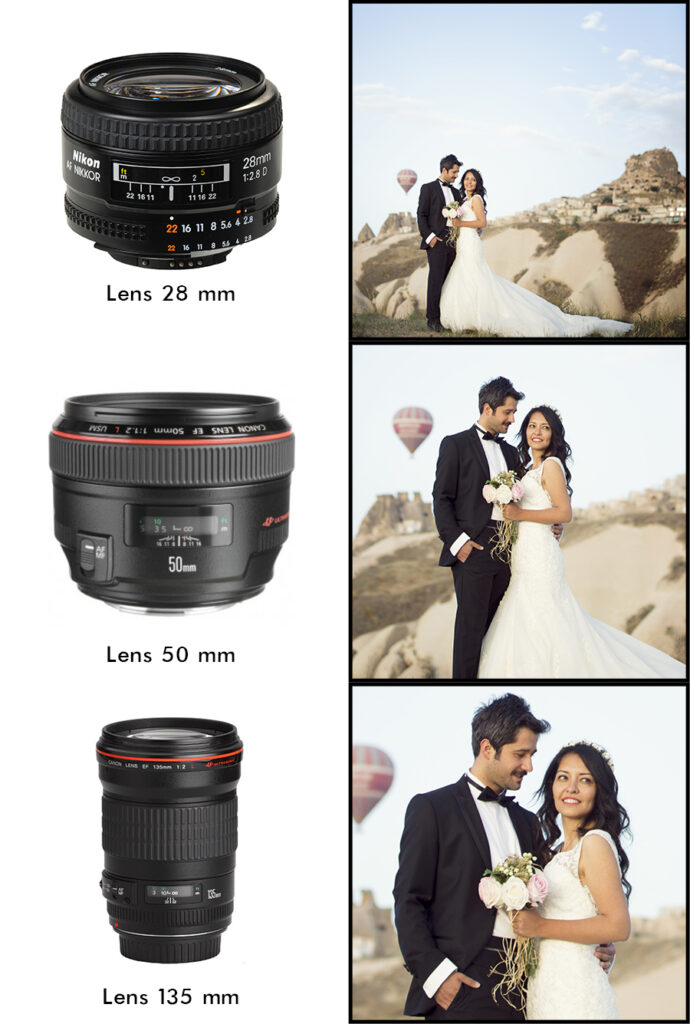
For diverse wedding photography needs, having a variety of lenses is crucial. Wide-angle lenses are ideal for group and interior shots, while lenses with longer focal lengths excel at candid and portrait photography. If you can’t bring two camera bodies, at least bring a selection of lenses with distinct focal lengths. A 35mm or 50mm prime lens can be versatile, but experienced photographers often use a combination like 35mm and 85mm to cover different scenarios.
15. Assemble an Emergency Wedding Kit

An emergency kit can be a lifesaver. Include essentials like pins, a wooden hanger, stain remover, and other small items. These supplies can handle unexpected issues and ensure smooth operations throughout the day.
16. Compile a Detailed Shot List
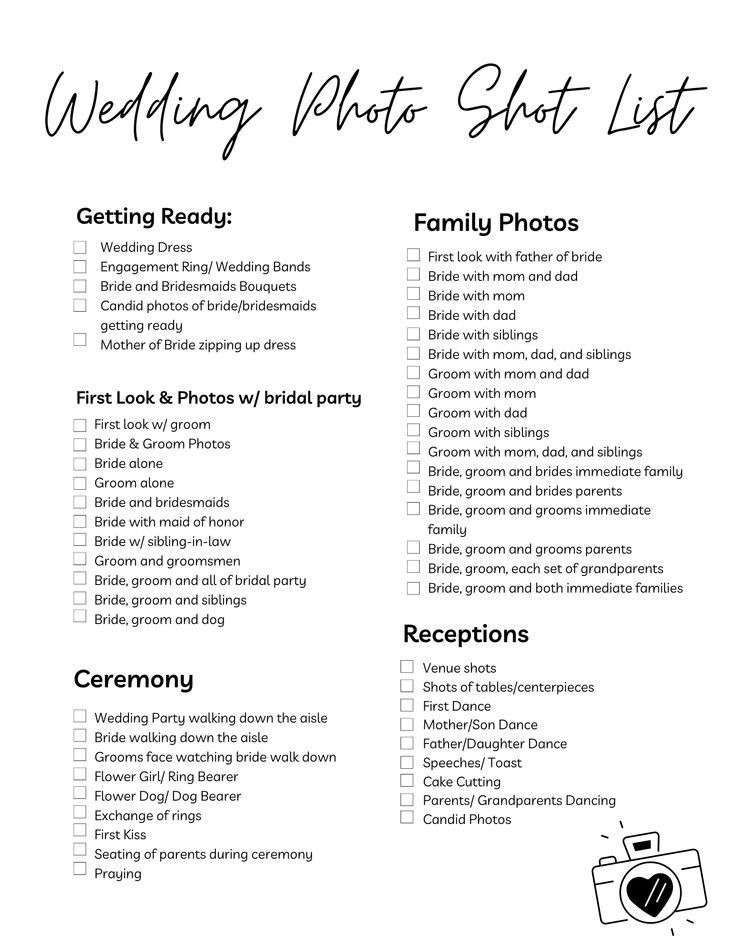
Prepare a shot list to capture all key moments and details. Discuss with the couple to include their personal preferences. Here’s a comprehensive list to consider:
Detail Shots:
- Wedding rings
- Close-ups of the veil
- Bouquets, corsages, and other floral arrangements
- Invitations
- Hanged dresses and suits
- The groom’s tie
- Shoes
- Perfume, jewelry, cufflinks
Bridal Coverage (1-1.5 hours):
- Bride, maid of honor, and bridesmaids getting ready
- Parents assisting with preparations
- Candid moments with the bride and her party
- Wedding dress photography
- Group photos with close relatives
- Artistic shots of the bride at the venue
Groom Coverage (30-45 minutes):
- Groom getting dressed
- Family photos
- Solo shots of the groom
- Candid moments with the wedding party
Ceremony:
- Wide-angle shots of the venue
- Wedding party walking down the aisle
- Bride and groom’s first look
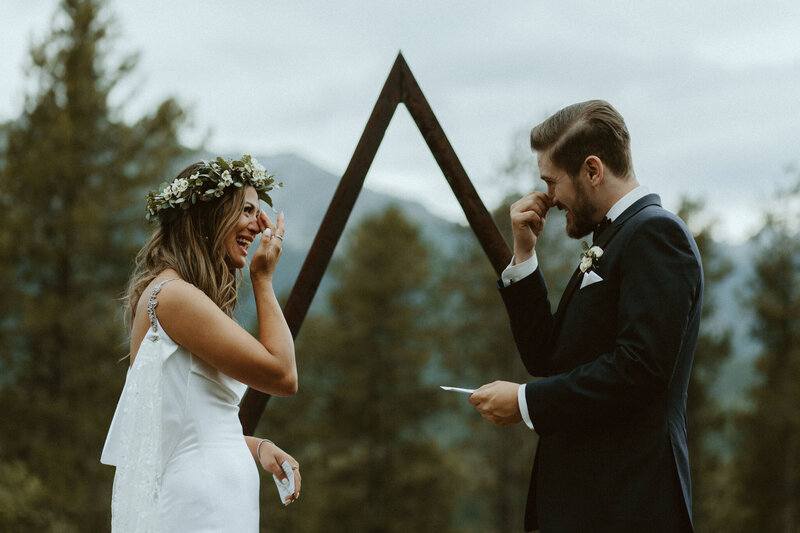
- Key moments like vows, ring exchange, and the first kiss
- Recessional and candid shots of celebrations
Group and Family Shots:
- Newlyweds with the officiant
- Both sets of parents
- Close and extended family
Reception:
- Venue setup, tables, food, and decorations
- Cocktail hour, toasts, cake cutting, and dances
- Candid moments with guests
- Special events like bouquet tossing and sparkler exits
17. Use the Right Camera Settings
Shoot in RAW: This format preserves image quality and offers more flexibility during editing.
Shutter Speed: Start with 1/250 for motion capture. For fast-paced moments, use 1/500 or faster to prevent blurriness.
Aperture: Use f/8 to f/16 for wide shots and f/2.8 to f/4 for portraits and details. Smaller apertures can isolate subjects and add artistic effects.
ISO: Keep it under 1000 to avoid noise. Increase ISO in low light, but keep it between 400 and 800 for clear, grain-free images.
Focal Length: Use macro lenses (100mm) for rings, 85mm for portraits, and 35mm for wide group shots.
18. Learn to Bounce Flash
On-camera flash can be harsh, but bouncing it off surfaces can create softer, more flattering light. Use TTL or manual mode and find a neutral-toned surface for the bounce. Outdoors, experiment with flash angles and settings to achieve the best results.
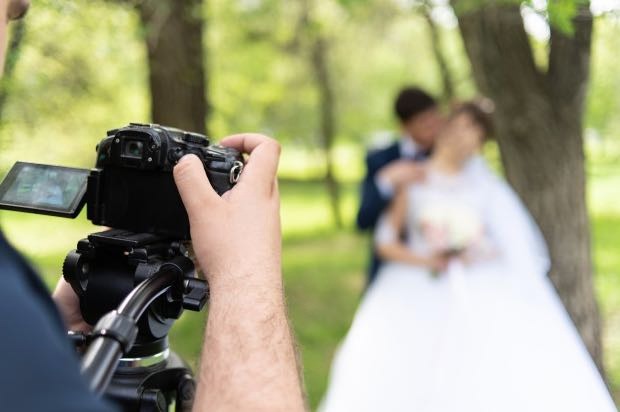
19. Experiment with Camera Angles
Varying your camera angles can add creative flair to your shots. Try high-angle shots, low-angle perspectives, or even aerial views with a drone. Changing angles can provide unique and engaging perspectives of the ceremony and reception.
20. Search for Existing Frames at the Venue
Look for architectural elements at the venue, like windows or archways, which can serve as natural frames for your photos. Using these features can create balanced and symmetrical compositions. Additionally, consider using guests as foreground elements to add context and capture their reactions during key moments, enhancing the emotional depth of your photos.
21. Find Inspiration Elsewhere

Draw inspiration from a variety of sources such as movies, film posters, ads, and magazine covers. Explore photographers from different genres—urban, event, portrait, or fine art—to spark new ideas and approaches. Social media, specialized platforms, and fashion magazines like Harper’s Bazaar are great places to discover fresh perspectives and techniques.
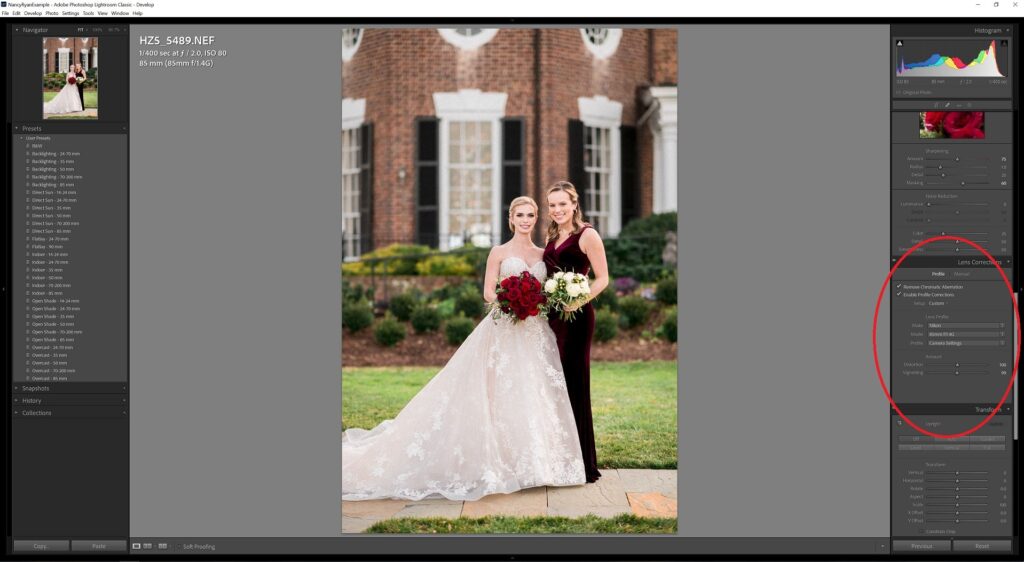
22. Use Trusted Editing Software
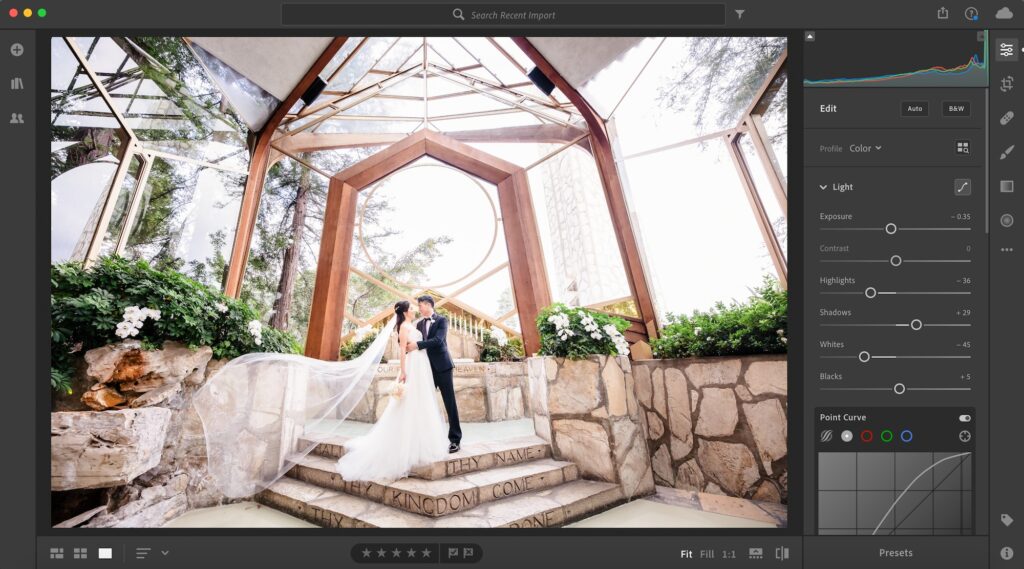
Post-processing is a critical part of wedding photography. Tools like Adobe Lightroom and Photoshop are industry standards, suitable for both beginners and professionals. These programs offer a range of features to enhance and refine your images, ensuring they look their best.
23. Be Aware of Common Wedding Photo Trends
Light, Bright, and Airy: This style features soft natural lighting and clean backgrounds. Aim for even tones with a histogram that leans slightly to the right, indicating a subtle overexposure.
Dark and Moody: Ideal for indoor venues with artificial lighting. Decrease exposure by 1.5 to 2.5 stops and boost Highlights and Whites sliders for a dramatic effect.
Matte Style: Best for outdoor photos, this style renders blacks as gray. Adjust the Tone Curve in Lightroom to achieve this effect.
Desaturated Areas: Mute colors in your photos for a softer look. Lower the tone values of specific colors to reduce vibrancy while maintaining overall image quality.
24. Master Basic Editing Tools

Avoid Overexposing Highlights: Ensure brighter areas of your photos retain detail. Use Lightroom or Photoshop’s Curves feature to manage highlights without losing important details.
Preserve Shadow Detail: Shadows should have enough detail to add depth. Adjust shadow values to keep details visible and enhance the image’s depth.
Avoid Excessive Cropping: While cropping can improve composition, excessive cropping can remove crucial details and affect image resolution. Aim for minimal cropping to maintain photo quality.
Consider Watermarking: For visibility, apply a small, subtle watermark. This helps potential clients remember you while avoiding distractions in the image.
Use the Clone Tool Wisely: The Clone tool can fix imperfections but use it carefully to avoid unnatural results. Ensure edits enhance rather than detract from the photo’s authenticity.
25. Speed Up Your Editing Process
Organize Photos: Sort images into folders based on different parts of the event, like the ceremony, decorations, and reception. This organization makes editing more manageable.
Generate Smart Previews: In Lightroom, enable Smart Previews during import to speed up editing and reduce processing time.
Utilize Hotkeys: Learn and use Lightroom shortcuts to streamline your editing workflow. Custom hotkeys can also help with frequently performed tasks.
Explore Outsourcing: For large volumes of work, consider outsourcing editing to professional retouchers. This allows you to focus on shooting while ensuring high-quality post-processing.
26. Create Online or Printed Wedding Albums
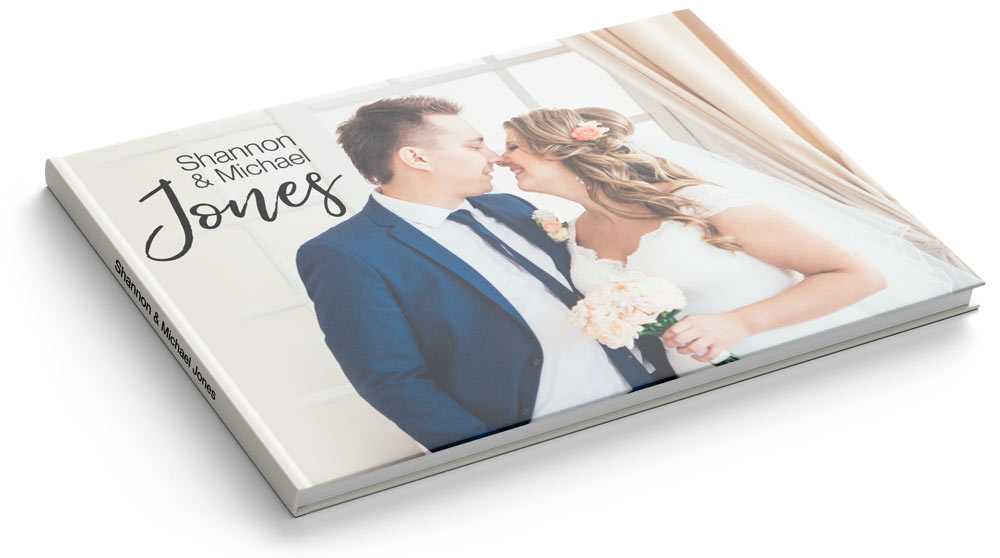
Provide clients with an exceptional photo-viewing experience by offering online galleries or printed albums. Use platforms like ShootProof or Pixieset for online galleries, and design printed albums with Adobe Bridge, Lightroom, or Photoshop to give a tangible keepsake of their special day.
27. Follow a Post-Wedding Timeline
To avoid losing photos, immediately transfer files from your SD card to an external hard drive. Adhere to the turnaround time specified in your contract, typically ranging from a few weeks to a few months, to deliver edited photos promptly.
28. Provide Referral Incentives
Encourage clients to leave reviews by offering referral incentives. Discounts on future shoots or print credits can motivate clients to write reviews and share their positive experiences. Consider offering additional session time or extra coverage as a token of appreciation, especially for clients with upcoming events.
Tools for Wedding Photography

To enhance your editing process, consider using universal Lightroom presets. These presets streamline the retouching process, making it easier to achieve professional results quickly. They are compatible with both Lightroom desktop and mobile versions.